Showing posts with label crafts. Show all posts

Saturday, December 21, 2013

Bulletin Board: We are Fishers of Men


Paper plates painted for the fish . . . 
Blue netting on top to add dimension . . .

Tuesday, July 10, 2012

Jesus Calms the Storm

VBS- "By the Sea" lesson- Jesus Calms the Storm

2 year old center- sorting boats by color


Jesus calms the storm craft. Use a piece of construction paper and fold the top down a few iches. Under the flap glue storm cloud and lightening.  Glue water and boat along bottom of construction paper. 


Lower flap and glue sun and white cloud. When you raise flap..you have a stormy sea. When you lower the flap you have a calm sea. 


Tune: "If You're Happy and You Know It"

Je-sus calmed the stormy sea.
Jesus spoke to the wind and said, "Peace be Still'
Je-sus calmed the stormy sea.


Our snacks to go along with the lesson were edible boats! We had apple boats with cheese sails and we also had banana boats with strawberry sails. These could be used with many lessons involving boats including Jonah, Paul being shipwrecked, Noah, apostles fishing, etc. 


Nets Full of Fish

VBS- "By the Sea" lesson- Nets full of fish


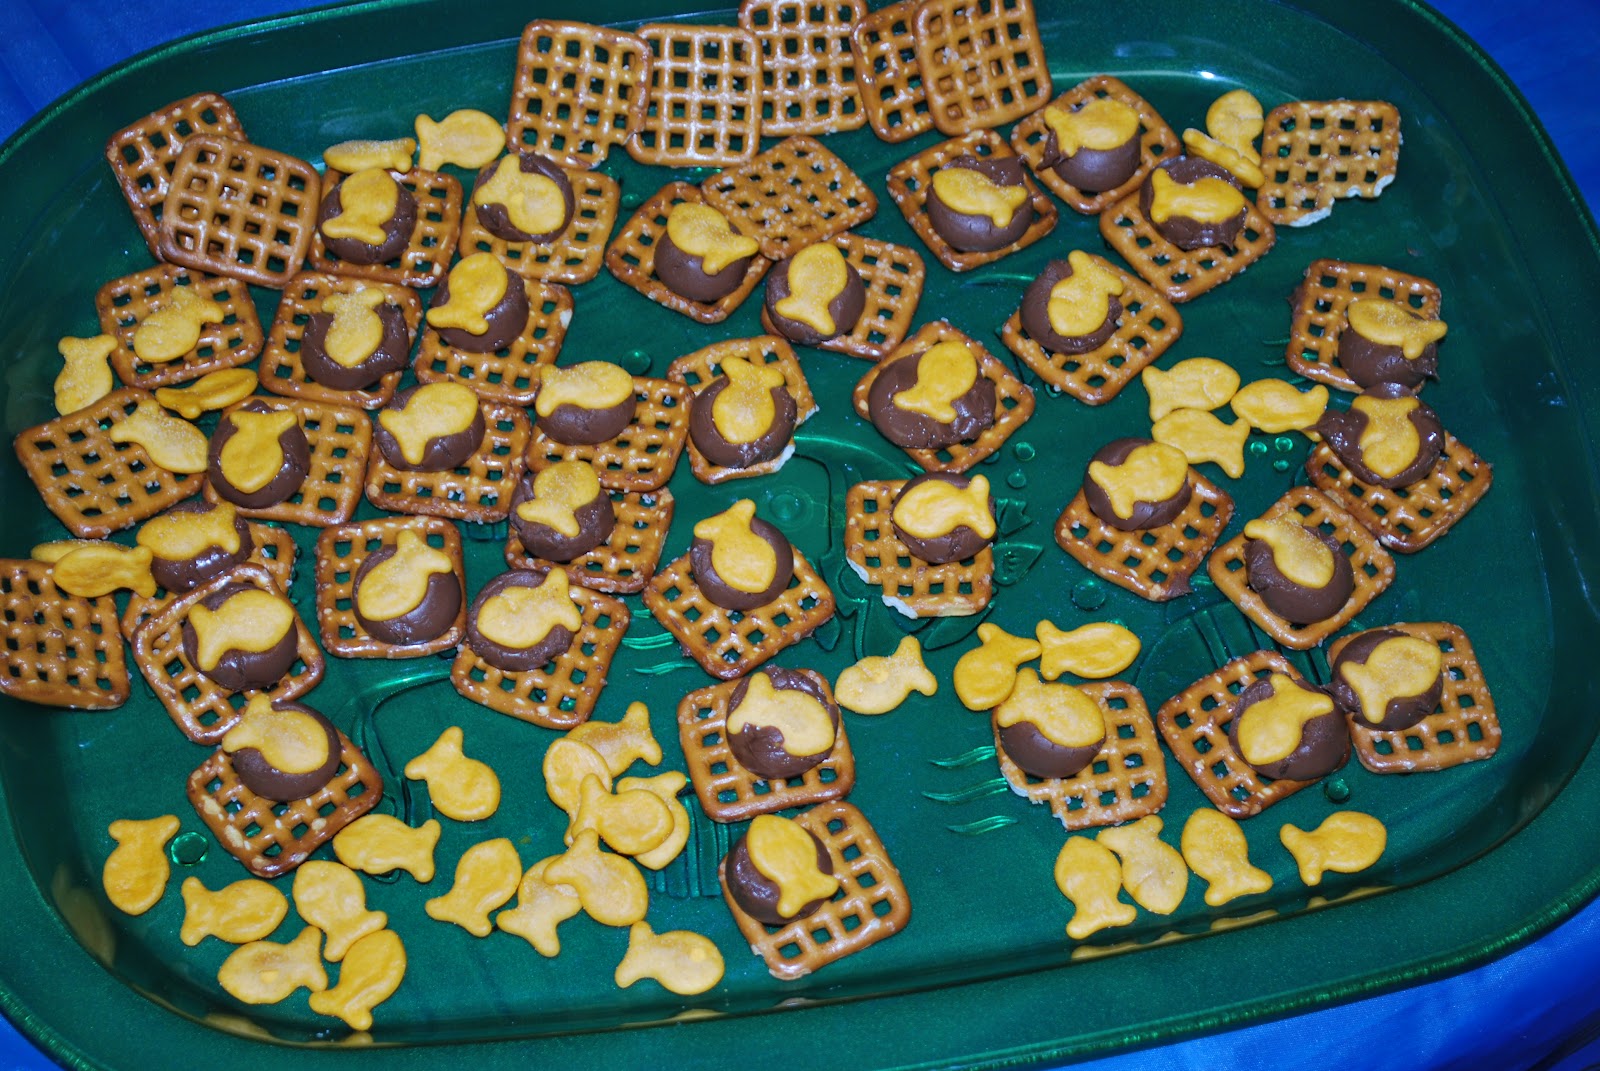
snack- nets with fish made using waffle pretzels, hershey kisses, and goldfish. Place kiss on pretzel and melt the for a few minutes in the oven. take out and press fish into chocolate. That's it!! So simple and tasty! Found this idea on Pinterest!


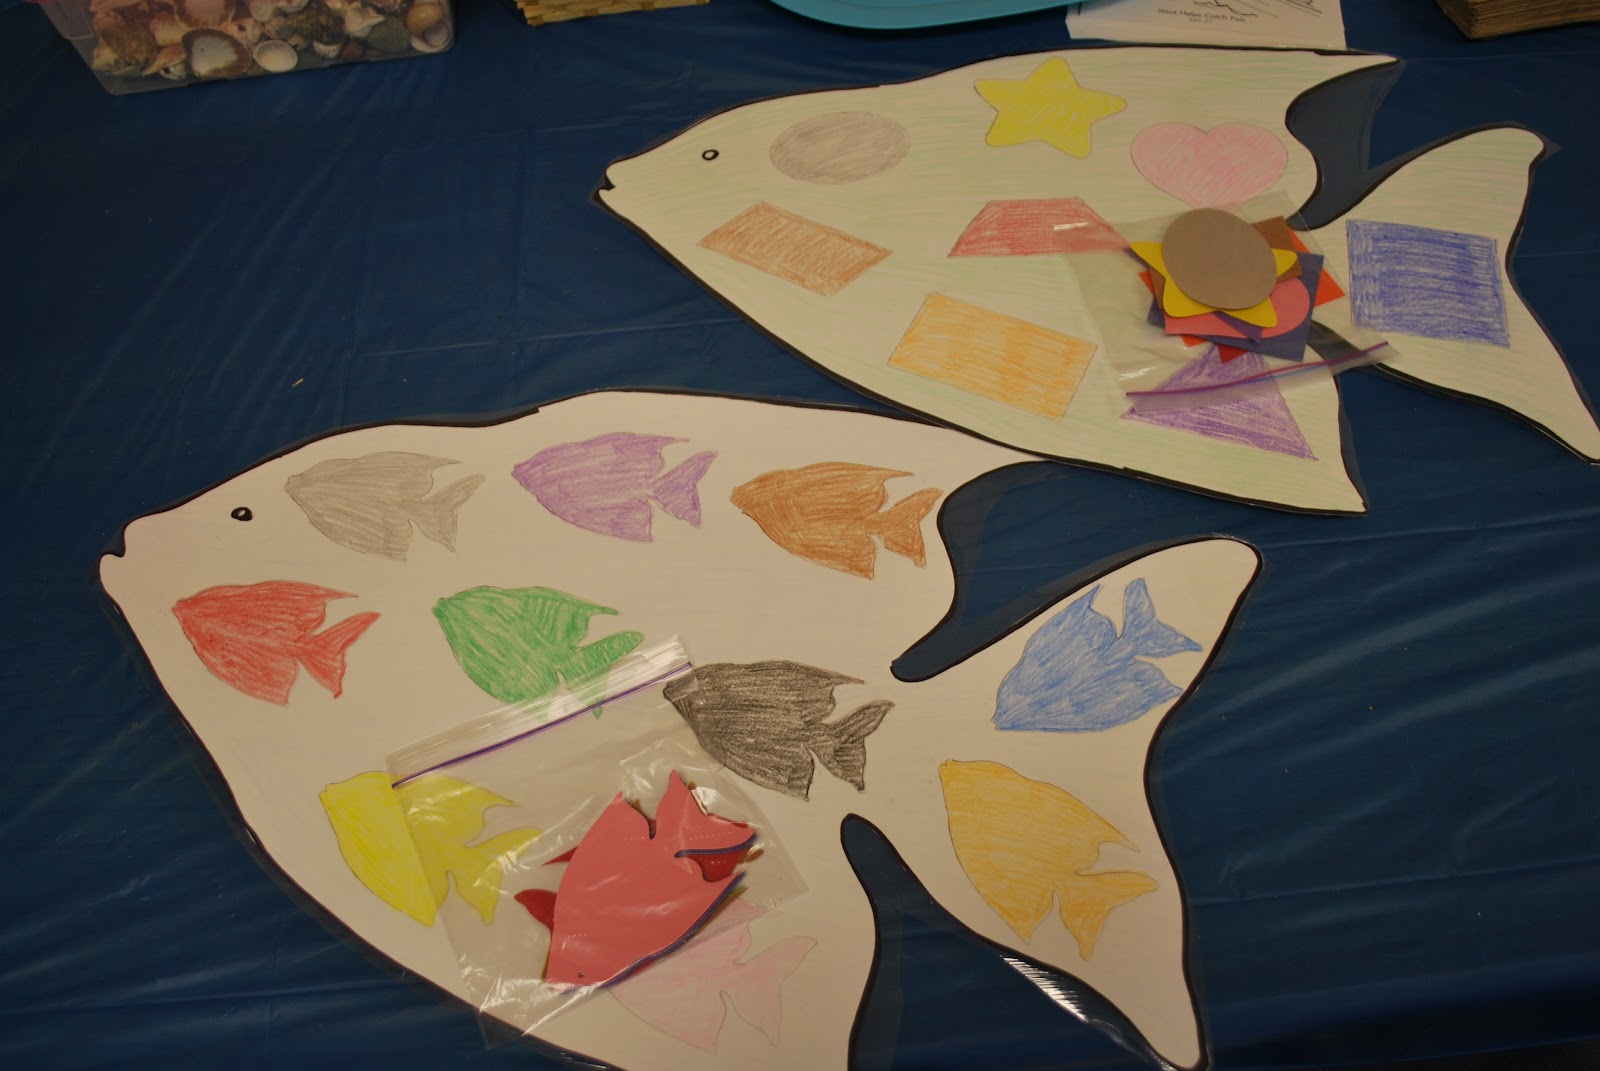
easy center for 2 year olds. Match colors and shapes


Fish matching center. Found foam fish on oriental trading


also found this craft idea on Pinterest. Used pieces of a laundry bag for the net, mini die cut fish, and jumbo popsicle sticks. 


Tune: "If You're Happy and You Know It" 

The apostles caught a bunch of fish
Jesus said, "cast your nets on the other side."
The apostles caught a bunch of fish.

Jesus Walks on Water

Just recently had our VBS. The theme was "By the Sea". One of our lessons was Jesus walking on the water. Here are a few things we did in the 2 year old class. 


Made a very simple paper plate craft using tissue paper, boat die cut, and Jesus clip art. 


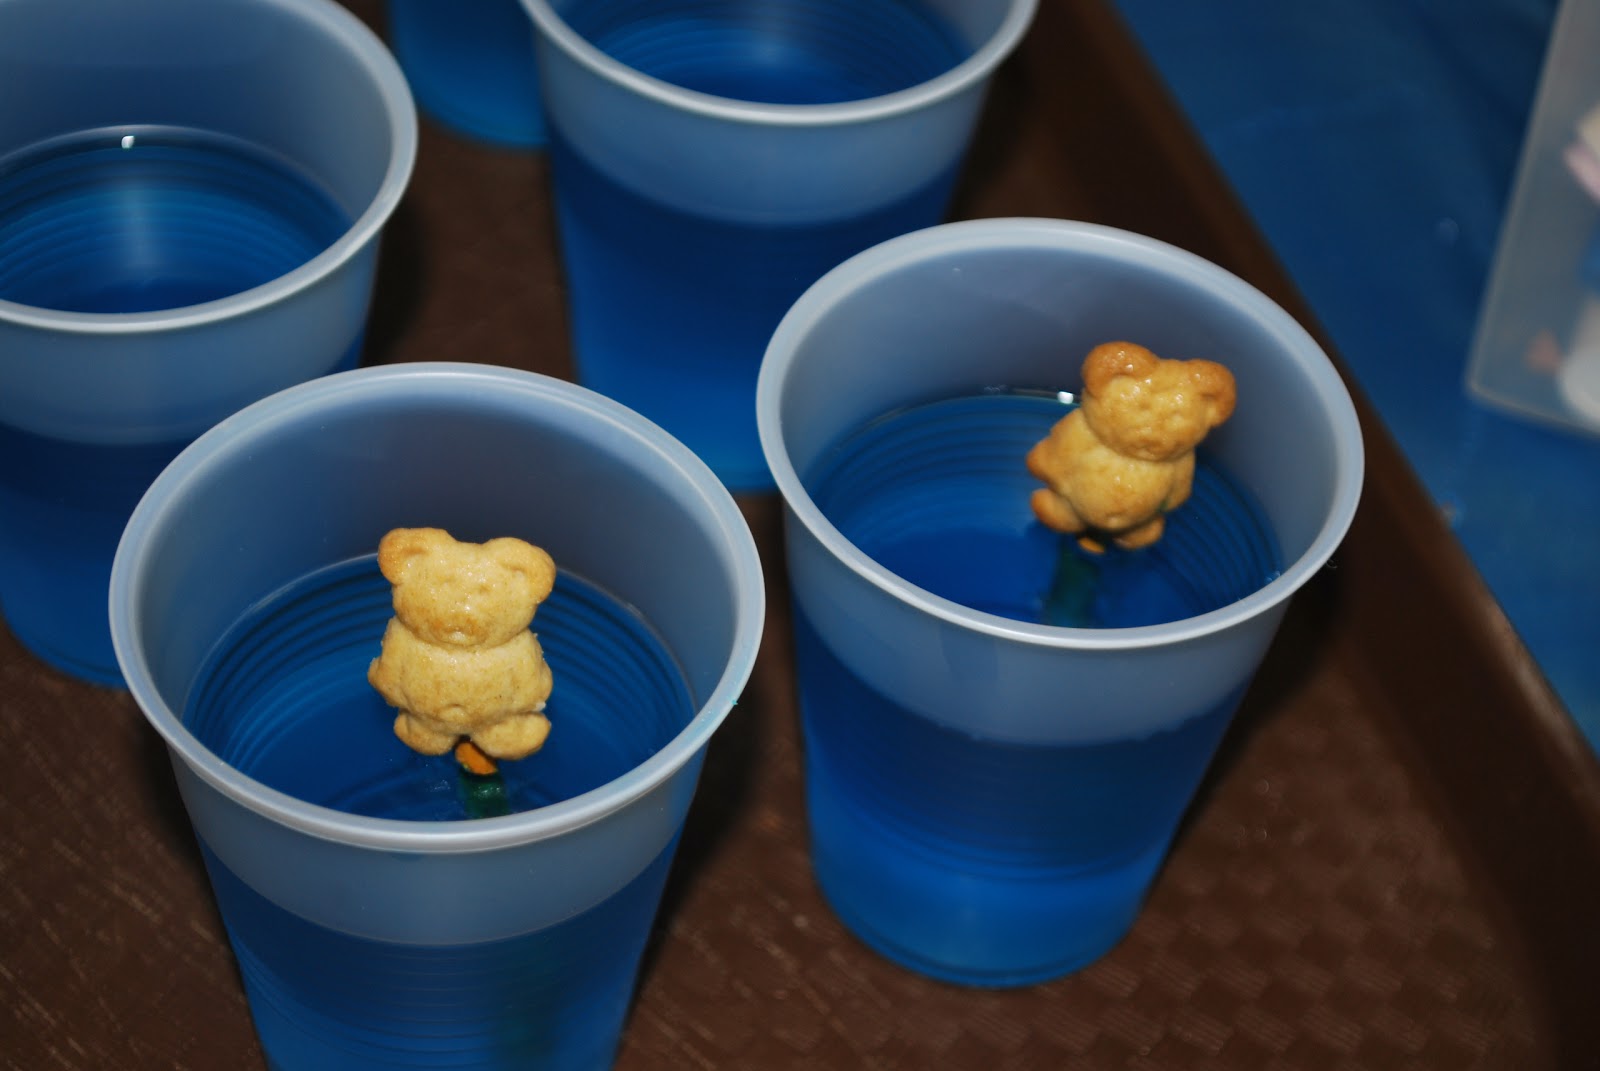
Ate blue jello with a teddy graham as Jesus. Was able to get the teddy graham to "walk on water" by "gluing" him to a pretzel stick with almond bark. 


Tune: "If You're Happy And You Know It" 

Je-sus walked upon the sea.
Peter tried to meet Him there,
but the waves were everywhere.
Je-sus walked upon the sea


Friday, December 23, 2011

Crossing the Red Sea Centers

To help us review the Red Sea lesson, we did the following centers.  The kids really enjoyed these activities.

The first thing we did was allowed them to make their own pillar of cloud and fire to take home.  This especially was great after the big hit it was during class.


Then, we gave each a child a SNACK size Zip-loc bag.  We put a little bit of toothpaste (usually a line of toothpaste squeezed at the very bottom of the bag) at the bottom of the bag and sealed it up.  Then we let them spread the toothpaste all over the bag.  Then we talked about how the Israelites crossed on fry land.  The children took their fingers and separated the toothpaste at one point on the bag to separate the toothpaste.  Then, we found footprint stickers for them to place on the dry land.


Their favorite center was the drama center where we let each child be Moses and separate the Red Sea.  Our Burning Bush mountain, turned into the mountain where Moses stood to cross the Red Sea.  Each child got to stand up on the mountain with a staff.  My helpers were on the floor by plastic blue tablecloths and when "Moses" raised his rod, the helpers raised the "waters."  The children who were not Moses were able to cross on dry land and they LOVED it!!!!!


They wanted to do this the next night as well!!

Wednesday, July 6, 2011

Simple Burning Bush Crafts

We had centers each night where the children would go and do something related to that night's lesson.  I wanted to keep everything very simple and decided on these two crafts for the burning bush night.

I got brown construction paper for the mountain and cut random bushes out of green construction paper. Then I (actually my son did this part) tore up red, yellow and orange pieces of construction paper placing each color in a different cup.  When the kids came to this center, their helper glued their bush where they wanted it and then placed lots of random glue dots all over the bush.  The child could then put the pieces of fire all over the bush to represent the bush burning!!


The next craft we found from Oriental Trading.  The kids were able to decorate a flip flop frame to help them remember that God told Moses to take his sandals off - which was one of their favorite parts of the story!!!  We added a picture of each sweet child in the sandal later on in the week and sent it home the last night of VBS.

Monday, February 14, 2011

Jonah and the big fish

Here is a super easy craft that I did with my preschool age kids. Cut a simple "big fish" shape out of construction paper. I would have used foam had I had any but I didn't so construction paper worked just fine. Print off a "Jonah" from the internet and stick Jonah on a craft stick. I glued a strip of construction paper to the back of the fish for the craft stick to slide behind but you wouldn't have to do that! Put a wiggle eye on and you're done!


Here is a cute song to use when teaching about Jonah (www.perpetualpreschool.com)
Tune: Are you sleeping?

Where is Jonah? Where is Jonah?
In a boat. In a boat.
What is Jonah doing? What is Jonah Doing?
Running from God. Running from God.

Where is Jonah? Where is Jonah?
In a fish. In a fish.
What is Jonah doing? What is Jonah doing?
Praying to God. Praying to God.

Where is Jonah? Where is Jonah?
On a hill. On a hill.
What is Jonah doing? What is Jonah doing?
Learning to love. Learning to love.

Where is Jonah? Where is Jonah?
Nineveh. Nineveh.
What is Jonah doing? What is Jonah doing?
Sharing God's love. Sharing God's love.

Saturday, January 8, 2011

Ears to Listen

My son's three year old teacher made these cute ears for them when they learned about God calling Samuel.  How easy was this!  She took headbands, cut paper ears and attached them to the headband with tape!!! My son wore these for the longest time!!!  However, what a great way to stress listening to God - at any age!

Paper Bag Sheep

We used a white lunch sack to make this cute little sheep for a lesson on David being a shepherd.  It was so easy to make and the kids LOVED them!!!!  Take a lunch sack. Stuff it with anything you have.  We used newspaper.  Fold over the ends and staple.  You may even want to tape the end to the bag.  Attach the head (We used a lamb mask pattern.) to the bag with glue or masking tape.  Cut four legs from white paper and tape to the bottom of the bag.  You can add cotton balls all over the sheep or one for the tail.  We made one for each child.  They were able to take one home at the end of the lesson.  We used them in the drama center.  The kids would collect all the sheep from all over the room and put them in the sheep corral.

You can also use these sheep for the parable of the lost sheep, as well as turning it into any animal you may need.

Sunday, January 2, 2011

Hezekiah's Sun Dial


My mother made these with her second graders when they studied Hezekiah.  It was so simple to do - using only 1 1/4 of a paper plate.  You see that one paper plate is laid flat and the times are drawn like our clocks.  Then, the student used a little bigger than 1/4 of another plate to make the dial.  They folded a flap down (see the first picture) and glued it down to help the dial stand.  How simple but perfect for these kids to see what the Bible was really talking about!  Good idea, Mom!!!

Tongues of Fire

I love teaching the book of Acts for many reasons!  This was a craft idea we used for Acts 2 - when the tongues of fire came upon the apostles.  It was so simple, fun, and effective!! Keys to any good craft project!  I used a sentence strip (which was really too big, so next time I will cut it in half) fit to each child's head.  Then, I gave them each a piece of red construction paper and a small part of yellow construction paper.  I let them design what they thought the tongues would have looked like.  We, then, glued the colors together and stapled them to the sentence strip.  The kids loved them and EVERYONE at church knew what we had studied about that night!

Sunday, October 31, 2010

Wise and Foolish Builders

Today's lesson in Kindergarten was about the Wise and Foolish builders. The kids have been singing "The Wise Man Built His House on The Rock" since they were babies so this story was familiar to most of them. We talked about what a parable is and the reason Jesus told parables.

We did this activity as we talked about why we should build our houses (lives) on a solid foundation (Jesus) and not on the sand! They loved this and thankfully it worked like it was supposed to. I did reinforce the house on the rock by taping the popsicle stick to the bottom of the pan before stacking up the rocks! We couldn't have that house falling too! The last time I tried this some of the rocks wouldn't stay put and the house leaned a little! I wanted it to stand firm this time.

Before the storm came!


The rains came down!


The house on the rock stood firm!

A very simple craft. Find pictures of houses and have the kids glue one on a rock and the other sideways on some sand!


Another wise and foolish builders song! Found this song here I printed off some coloring pages to use as visuals to go along with the song. I put the words on the back of each picture

Tune: This Old Man
This wise man, he built well
he built well up on a rock


When the rains came down
And the Floods came up
This man's house stood firm and strong!


Foolish man, he built wrong
he built wrong up on the sand


When the rains came down
And the Floods came up
This man's house came tumbling down!

Saturday, October 9, 2010

Leper Being Healed Craft

Using wooden ice cream spoons, you can make this cute craft to help your child remember lepers being healed from the Bible.  To create the clothes, cut a square of fabric to fit the size of your spoon.  Fold the square in half (like a hot dog), and cut a slit for the head to go into.  On one side, draw a sad sick face.
and, then on the other side, draw a happy face to show how they felt after being healed.
Idea from Kim Cook

Clothespin Animals

This is a cute and easy way to make any animal for any lesson you have.  We found a picture of a sheep, copied it on cardstock to make it sturdy, cut it out and added clothespins for the legs.  Easy for the children to use in the classroom during a review, as a craft, or as a take home.  The possibilities are endless!


Zaacheus

This is a great multiple use idea for the lesson of Zaacheus, again from the lady at Campbell Street.  You could use a toilet paper roll and half of a green paper plate to make the tree.  Find a picture that would represent Zaacheus.  You can choose to do this craft as a class and send it home.  You could also make a number of these for a center game to review the story of Zaacheus.  Write the questions on the trees and answers on Zaacheus.  The kids would love playing this game!

A Fiery Furnace Craft

This is a craft from a teacher at Campbell Street.  We have done one like this as well but I did not have a picture of it.  A paper lunch bag was used upside down.  A hole was cut out with flames added to the hole and above the bag.  Pictures of the 3 friends were made and placed on straws so the kids can put them in and out of the furnace.  Tissue paper can also be used to make the flames.

Saturday, September 19, 2009

Edible Manger!

Recently when teaching a lesson on "Jesus is Born" I made these edible mangers for the class to enjoy. I found the idea for these in a book Becky had called "Creative Bible Learning -Science and Cooking" by. Karyn Henley. This is a very neat book. They were fairly easy to make and the kids really enjoyed them.


Recipe
2 bags of butterscotch chips
1 can chow mein noodles
1 can cocktail peanuts (I omitted these due to a peanut allergy in our class..and I prefer them without peanuts anyway) I think the peanuts would make them harder to work with too!
1 bag small pretzel twist


1. Melt butterscotch chips in a saucepan
2. Stir in peanuts and chow mein noodles
3. Place spoonful of mixture on wax paper
4. Press with spoon (or fingers) into the center of the mixture to make it look like a manger
5. gently press a pretzel twist onto each end of the manger. (Do this before the mixture cools. The pretzels form the manger legs.)

Enjoy!

Saturday, June 27, 2009

Jesus Heals 10 lepers

Crafts

Here are 2 very easy crafts to do when teaching about the 10 lepers.

For this craft we cut out body shapes from construction paper and used white dot stickers (found at Wal-mart or any office supply store) and let the children stick leper spots on one side. We added a sad face to that side. On the other side the kids put a happy face and a band-aid to show that they were healed!

This is a really cute craft/take home for this lesson. We used wooden spoons and scraps of material to make these lepers. Just like the above craft we put a happy face on one side and a sad face on the other. On the side with the sad face we added puff paint to make leper spots. It does take a little while for the spots to dry so you might want to do this at the beginning of class if you want to send them home the same day. I did these with the 2 year olds at VBS and went early in the day and put the spots on and let the kids help add the clothes that night.

Friday, June 26, 2009

Jesus Calms the Storm

Crafts

Here are a few craft we used when teaching a lesson on "Jesus Calms the Storm" during VBS. These could be used with several other lessons like Noah, Jesus walks on Water, Paul's Shipwreck, etc!

Ocean Bags
Snack size ziplocks work great for this craft. Place a small amount of blue toothpaste in the bag, seal it, and let the child spread the toothpaste out by rubbing over the bag. You can use stickers to stick on the outside or even place something small on the inside.


Wave Streamers
Use blue and white or dark blue and light blue streamers to make this craft. Cut pieces of streamers and either tape or glue them to the end of a jumbo popsicle stick. The kids like to help make a storm by waving the streamers (waves) in the air and then stopping when you get to the part of the lesson where Jesus calms the storm.


Ocean in a Bottle
This is a fun take home idea. I made a big one with a large bottle to use during my lesson with the 2 year olds. I found small water bottles for the kids to have. For older kids you might could let them help make the oceans but for our younger kids we made them ahead of time and sent them home after the lesson so they could have their own ocean at home to review the lesson with. They are a lot of fun. It is important to make sure you glue the lid on so it WON'T come off. I used hot glue on mine.


When rocked (not shaken) from side to side it makes neat waves!
This "ocean in a bottle" craft was made using the following recipe...very simple! This recipe works very well!!

Fill bottle about 1/2 full of water, add blue (just a few drops) of food coloring, shake to turn water blue, fill the rest of the way with cooking oil. Seal and glue lid! You may also want to add shells, fish, glitter, etc before sealing! For a different ocean in a bottle recipe click here

Wednesday, June 24, 2009

Feeding the 5000

CRAFTS

I taught the 2 year olds this year at VBS. They were a lot of fun. We did several crafts each night to go along with the lesson. One of our lessons was about Jesus feeding the 5000. Kim taught the 3 year olds and may have some different things to share from her class to go along with this lesson.

We made loaves and fish necklaces using Ziti and paper fish.

Kim's class made these cute baskets by cutting off the top half of a brown paper lunch sack and adding a construction paper handle. They counted out 5 loaves and 2 fish to go in their baskets.

My class made these baskets by lacing yarn around the edges and placing 5 loaves and 2 fish inside. Kim found this pattern for us but any basket pattern would work by punching holes along the edges. As you can see in the pictures I starting the lacing for my 2 year olds and just had them finish the last few holes with the assistance of my helpers. They enjoyed doing this craft.

We did a very simple fish craft to go along with this lesson. I found this cute pattern online and enlarged it and had the kids glue tissue paper all over it. They love doing anything that allows them to use glue!!

We sang several cute songs and did a couple of other activities to go along with this lesson. We will try to post those soon

LinkWithin

Related Posts Plugin for WordPress, Blogger...